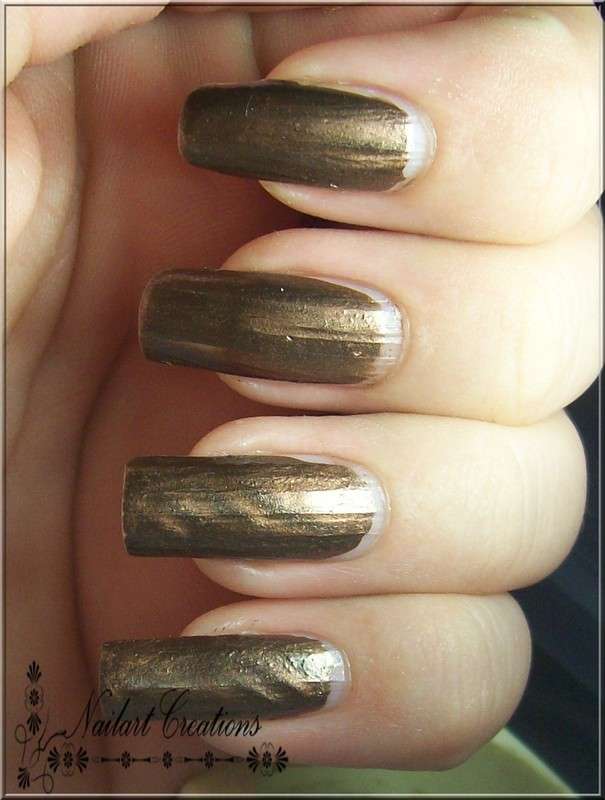
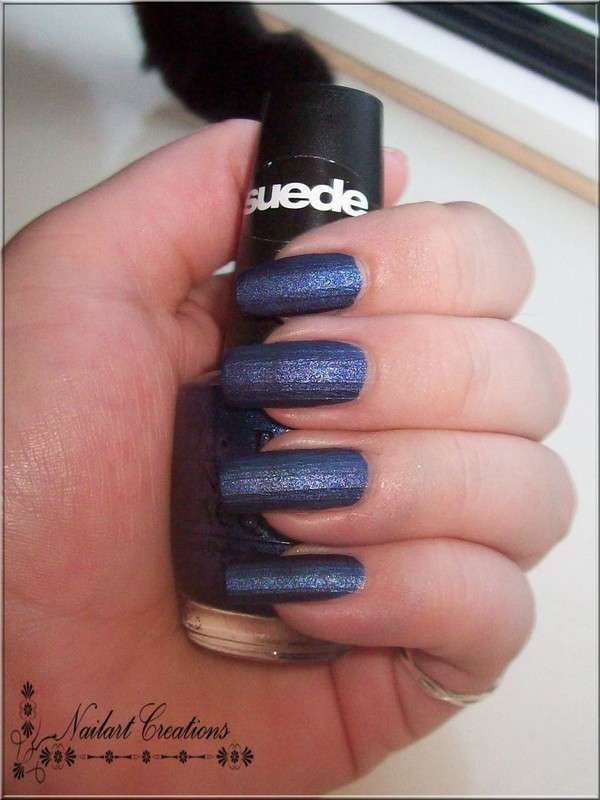
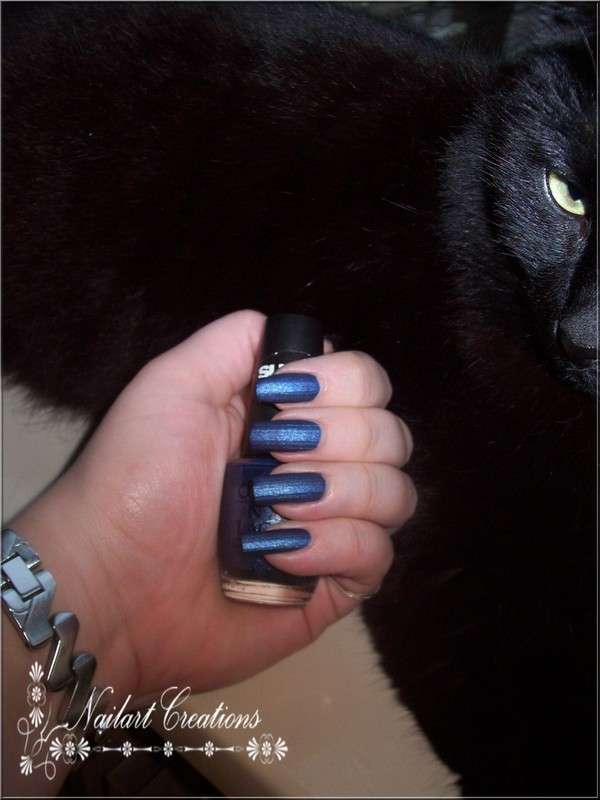
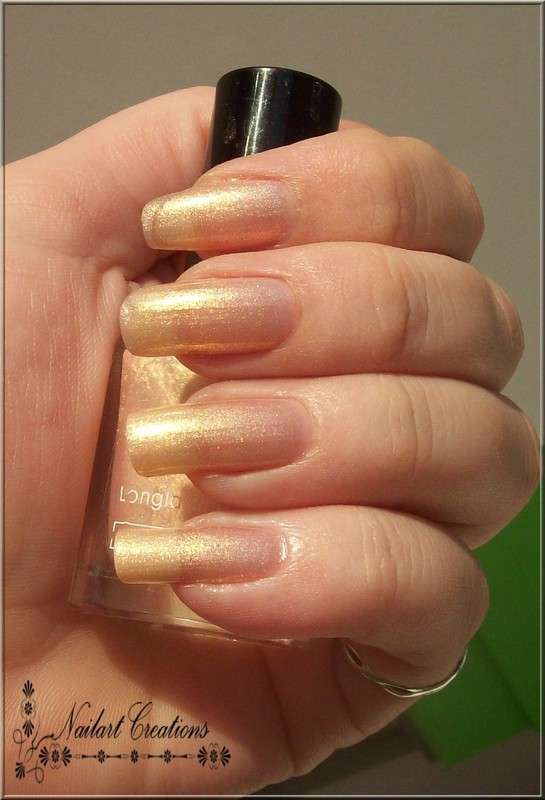
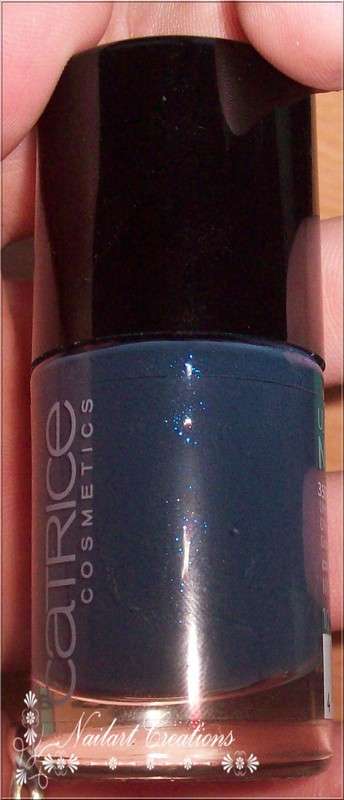
Copper Rulez! is een lakje uit de laatste LE collectie van Essence, namelijk de Metallics collectie. Een tijdje geleden liet ik al weten dat ik niet zo heel omver geblazen was door deze collectie, en dat ben ik nog steeds niet. Maar toch wat swatches om te laten zien hoe dit lakje eruit ziet. Binnenkort ook een review over Nothing Else Metals uit deze collectie.
Copper Rulez! is one of the polishes from the last LE from Essence, the Metallics collection. A while ago I've let you know that I wasn't blown away by these polishes, and still i'm not blown away. But i've got some swatches to show you today. Soon another review about Nothing Else Metals (the other polish from this collection).
Zo ziet dit lakje eruit, donker brons achtig. Opzich een mooie kleur, maar ik ben er niet zo gek van omdat dit lakje streept als een gek! Ook is het kwastje wat in dit potje zit een beetje raar, er zijn een paar haartjes die alle kanten op springen, hierdoor is echt netjes lakken niet mogelijk. (Dit zal denk ik ook wel aan mijn potje liggen, neem aan dat niet alle kwastjes in dit potje zo zijn).
This is how the polish looks like, a little bit dark bronze. It's not an average colour, but this polish is so streaky that I don't like it anyway. My brush is a little bit strange too, there are some hairs which are pointing the other way, so it's not really possible to polish very neatly with this. ( But I think that's just my polish, don't think every bottle has this kind of brushes..)
Dit lakje is ook magnetisch, dus heb ik met het bijpassende magneetje wat geprobeerd. ( Ook nog met zo'n beetje alle andere magneten welke ik in huis kon vinden) Ik heb uiteindelijk ongeveer 8x alles erop en eraf gehaald en hierboven zie je 2 nagels met het beste resultaat wat ik kon krijgen.. Ik ben er wel achter gekomen dat ik dus dit effect pas krijg wanneer ik er een enorme dikke laag op smeer.. Hmm nee dit droogt niet, dus niets voor mij.. Na de vele pogingen welke ik genomen heb, heb ik nu ook maar besloten dat dit lakje ergens achterin de kast verdwijnt..
This polish is also a magnetic polish, so I tried it with the magnet. (and all the other magnets I found in my house). So I tried it more than 8 times, and above result is the best I had.. So i found out I get this magnetic design when I use a horrible thick layer of polish. Hmm no that doesn't dry.. So it's nothing for me. I decided to put this polish somewhere in the back of my stash to never look at it again..
Zijn er meerdere die een beetje teleurgesteld zijn in deze LE?/ Are there more ladies who are a bit disappointed by this collection?
dinsdag 30 november 2010
La Femme Beauty - Brown Satin
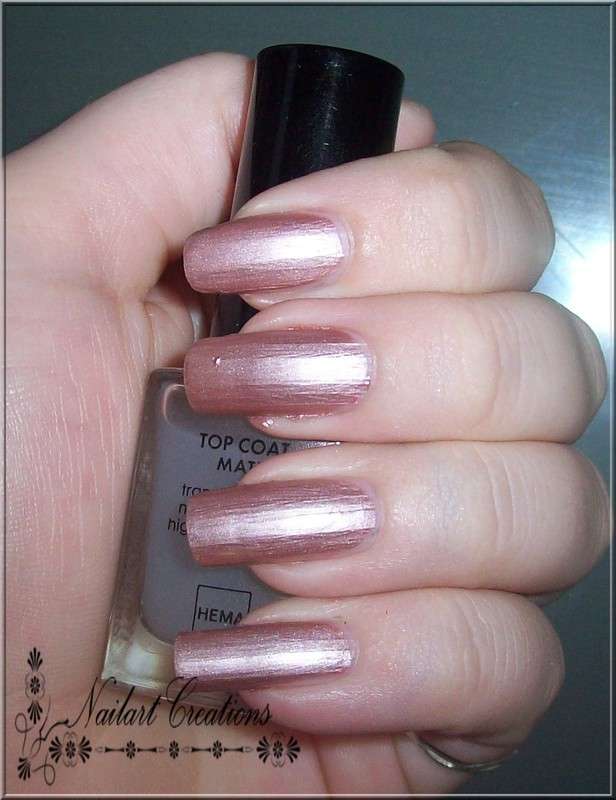
Laatst was ik eens flink door mn stash aan het graaien naar een lakje waarnaar ik eigenlijk nooit kijk. Zo kwam ik uit bij La Femme Beauty - Brown Satin! Vandaag ga ik jullie de swatches van dit lakje laten zien!
A while ago I was searching for a never used older polish in my stash. So i found La Femme Beauty - Brown Satin. Today i'm going to show the swatches from this polish!
Brown Satin is een mooi zacht bruin/nudeachtig kleurtje. Hij dekt redelijk, ik heb hier 3 dunne laagjes gebruikt, het enige nadeel aan dit lakje is zoals je kunt zien dat hij nogal streperig is.. Ik vond het ook erg jammer dat dit lakje niet mat is, wanneer ik het woordje satin hoor denk ik toch aan iets mats!
Brown Satin is a gorgeous light brown/nude shade. The polish covers in 3 thin layers, but i've got an disadvantage.. The polish is very streaky like you can see! And when I hear Satin I think matt!
Dus ik besloot de lak ook mat te maken! En wow wat was dit een verrassing zeg! Het streperige effect verdween en hij ziet er gewoon prachtig uit nu! Dit is echt het eerste lakje waarvan ik denk dat dit matte effect echt een hele vooruitgang is. Ik ga hem vanaf nu dus ook absoluut niet meer dragen zonder matte topcoat!
So I decided to add some matt topcoat! And wow, what a surprise! The streaky effect is totally gone and it looks absolutely stunning now! So this is absolutely the first polish which I think the matt effect is a really good idea. From now I'm only gonna wear this one with matt topcoat :)!
Hoe vinden jullie dit lakje mooier, hoe hij origineel is of met de matte topcoat?/ How do you like this polish? In it's original state or with the matt topcoat?
Labels:
La Femme Beauty,
swatches
zondag 28 november 2010
Tutorial: How to make cupcakes!
Een tijdje terug liet ik al de notd van de cupcakes zien. Vandaag ga ik de fototutorial plaatsen. Nu is het dus je kans om deze cupcakes ook te maken!
A while ago I posted a notd with cupcake nailart. Today i'm going to show you the tutorial how you can make these cupcakes by yourself!
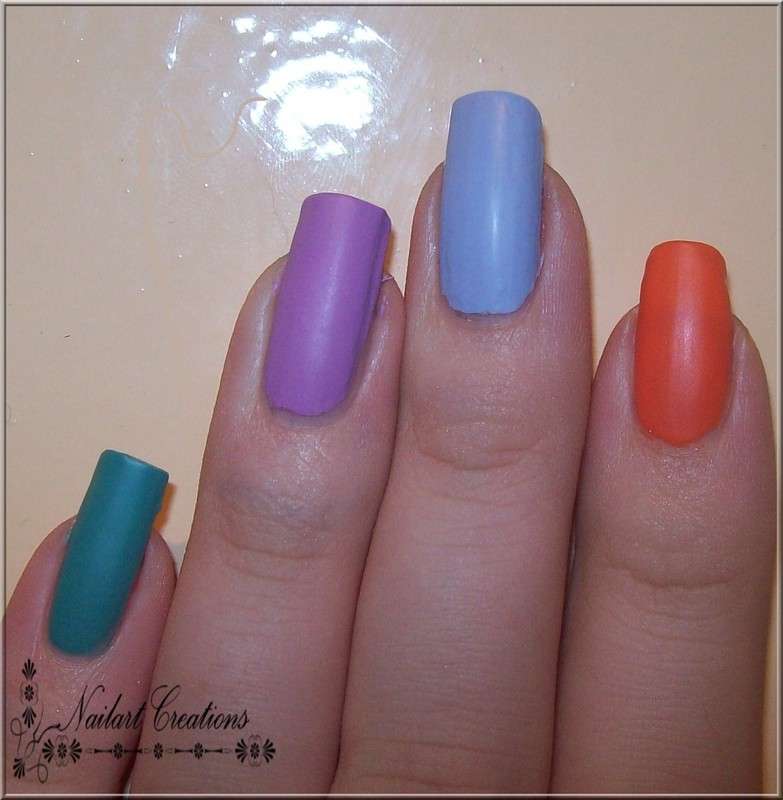
Natuurlijk begin je eerst met de basiskleuren, ik heb ervoor gekozen om op iedere nagel de cupcake een andere kleur te geven (Hier kun je de kleurtjes vinden welke ik gebruikt heb). Ik heb de kleurtjes daarna ook mat gemaakt, om de cupcakes een aparte look te geven. Je kunt ze uiteraard ook glanzend laten, of allemaal hetzelfde kleurtje!
Ofcourse you start with the basecolours, I choosed for every nail another nailpolish (You can find the polishes I used here). Up next I made the colours matte to give it a special look. Ofcourse you can make them shiny or every cupcake the same colour, it's your choice!
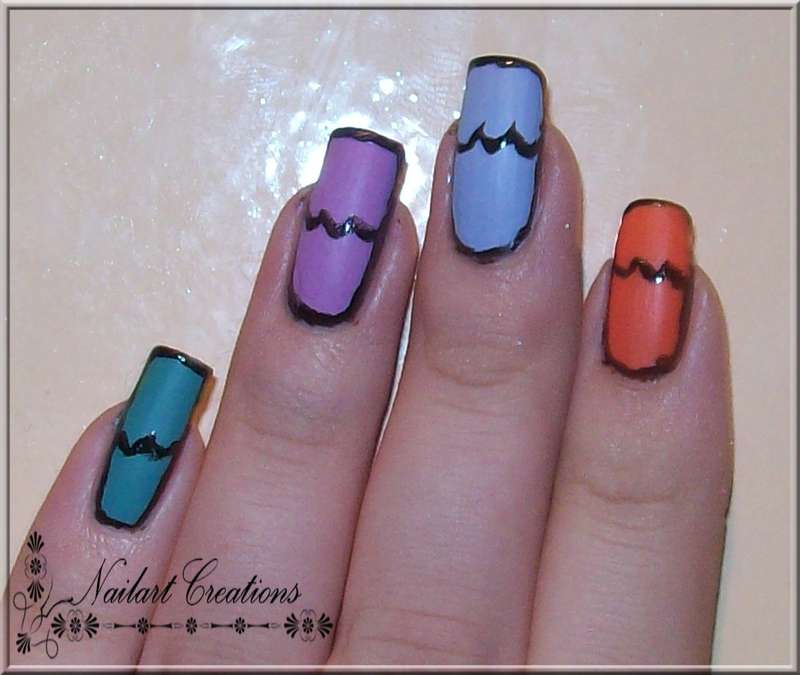
Nu begin je met de uitlijning van de cupcakes. Ik heb een simpele zwarte lak van de hema genomen en een klein kwastje om de uitlijning te maken. Het makkelijkste is om eerst je gehele nagel een zwarte rand te geven (in het geval van vierkante nagels (wat ik dus heb) kun je de randjes op de tips rond afwerken, zo zien de cupcakes er vanboven toch nog rond uit). Na de hele nagel een lijn gegeven te hebben maak je ongeveer in het midden van je nagel een paar hobbelige lijntjes zoals hierboven.
Up next you make the outline of the cupcakes. I used a simple black polish from Hema with a little brush to make the lines. The easiest way is to begin with a black line round your nails. (If you haven't got round nails, make the black line a little bit round (now it looks round too ;)). After the outlining of your whole nail, you'll start with an bumpy line on the middle of your nails (just like I did on above pic).
De volgende stap is de bovenkant van de cupcakes opvullen met witte nagellak. Ik heb hiervoor La Femme beauty - White gebruikt. Het mooiste is om wel een goede dekkende witte nagellak te nemen, dit geeft een mooier resultaat.
The next step is fill in the above half of the cupcakes with a white polish. I used La Femme Beauty - White for this one. It's a good idea to use a good pigmented white polish, this has the best results.
Nu gaan we de bovenkant van de cupcakes versieren met wat 'snoepjes'. Ik heb hiervoor kleine gekleurde beads gebruikt die ik met wat nagellijm vast heb gezet. Je kunt ook verschillende soorten stipjes zetten met bijvoorbeeld een dotting tool of een kwastje. Ook kun je gekleurde kleine rhinestones gebruiken, met dit deel kun je je eigenlijk gewoon uitleven met wat je maar wilt!
Now we're going to decorate the cupcakes with some 'candy'. I used some coloured beads. I put them on my nails with some nailglue. You can make some tiny coloured dots with a dotting tool or brush too. You can pick up some little rhinestones too! This part is for filling in your own choice!
Als laatste zet je op iedere nagel 3 verticale zwarte streepjes. En nu zijn je cupcakes helemaal klaar! Het is dus niet zo'n hele ingewikkelde nailart om te maken! Nu lijkt het me ook erg leuk om jullie creaties te zien! Dus heb jij toevallig ook cupcakes op je nagels gemaakt? Of ga je deze maken met behulp van mijn tutorial? Ik zou het erg leuk vinden als jullie je cupcakenailart zouden mailen naar: nailartcreationsblog@gmail.com. Als er genoeg mailtjes binnen komen wil ik hier een aparte post van maken met jullie foto's! (Dus met jullie namen inclusief jullie bloglinks (meteen ook een beetje reclame voor jullie eigen blogs! ;)).
The last step is the 3 vertical stripes on each nail. And now are the cupcakes ready! So it's not a really difficult nailart to make! Now you would be making me very happy when you also made an cupcakenailart, or when you're going to make one with some help of this tutorial. So sent me your cupcakenailart pictures to: nailartcreationsblog@gmail.com. When there are enough pictures i'm going to make a post with your pictures! ( Including your name and bloglink ofcourse, so it's at the same time a good moment to promote your blog ;)).
Dus ik hoop dat jullie je leuke creaties naar me toe zenden!/ So I'll hope you guys will mail your gorgeous cupcakenailarts!
Labels:
Handmade Nailart,
Tutorials
donderdag 25 november 2010
Nailart on Popsticks #4
Vandaag weer een nieuwe nailart on popsticks! Dit keer heb ik een nailart van een leeuwenkop gemaakt! Lees verder om te zien hoe de nailart eruit ziet!
Today another Nailart on Popsticks! This time I made a Lionhead! Scroll down to see how it looks like!
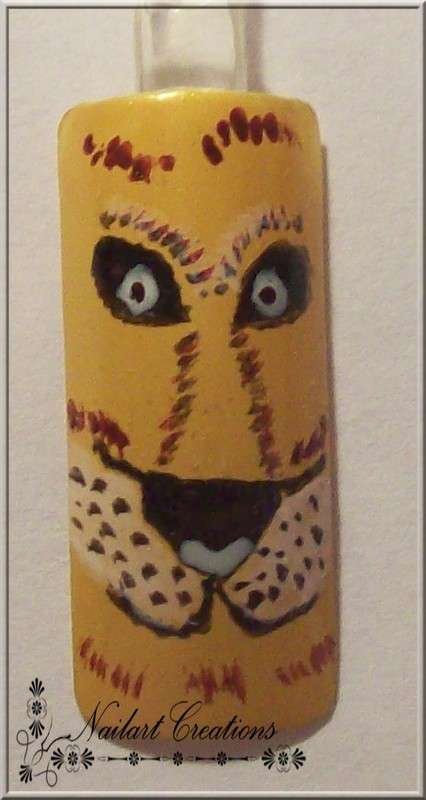
Dit is de nailart geworden! Je begint uiteraard met een mooie oranje/bruin achtige lak voor de achtergrond van deze nailart. Ik heb China Glaze - Golden Opportunity gebruikt als basislak. Vervolgens begin je met de 2 oogjes, en het neusje inclusief mondje. Wanneer dit droog is maak je het snuitje wit met een witte lak, niet een te dikke witte laag het moet natuurlijk wel een beetje subtiel/onopvallend blijven! Als de witte laag droog is maak je kleine zwarte stipjes op het snuitje. En maak je de oogjes met een wit en zwart stipje helemaal af. Als finishing touch maak je wat haartjes en wenkbrauwen/accenten op het kopje! Het is een beetje lastig uit te leggen, dit is een beetje op gevoel wat streepjes zetten!
This is the nailart! You start with the basecolour, I used China Glaze - Golden Opportunity for this one. Up next you start making the eyes and nose/mouth of the lion with a black polish. After that's dry you fill up the mouth with some white nailpolish. Make sure you don't use to much white because it has to be very subtile. When everything is dry you make little black dots on the mouth of the lion. Then make some white dots in the eyes and a little black dot. For the finishing touch you'll give the lion some hair and eyebrows, it's hard to explain, but you have to do it with your own feelings!
Ik heb deze nailart ook op mijn eigen nagels gemaakt. De foto kun je hierboven zien, dit is inmiddels alweer bijna een jaar geleden(!!). Dus hier zijn alle nagels nog erg ongelijk, let daar maar niet zo op en geniet van de nailart! Ik heb er hiervoor gekozen om enkel de leeuwenkop op mijn ringvinger te maken zodat het totaalplaatje niet te druk zou worden.
I made this nailart on my own nails too. It's almost a year ago, so my nails were still unequel here, so don't mind that and enjoy the nailart! I made one lion on my ringfingers because I didn't want to make it really popping.
Good luck with trying this nailart out!
Labels:
Handmade Nailart,
Popsticks
dinsdag 23 november 2010
Essence - High Waist Pink
High Waist Pink is het derde lakje van de Denim Collectie welke ik geswatcht heb. Er zijn nog 2 andere kleurtjes in deze collectie (een grijze en zwarte) maar deze vond ik zelf niet zo indrukwekkend. De Denim collectie is inmiddels alweer oud, de Metallics collectie ligt alweer volop in de winkel!
High Waist Pink is the third polish from the Denim Collection which I own. There are 2 others colours in this collection, but I didn't bought them because I didn't really liked the gray and black polish. Alright the denim collection is already in the past, the metallics collection is now available!
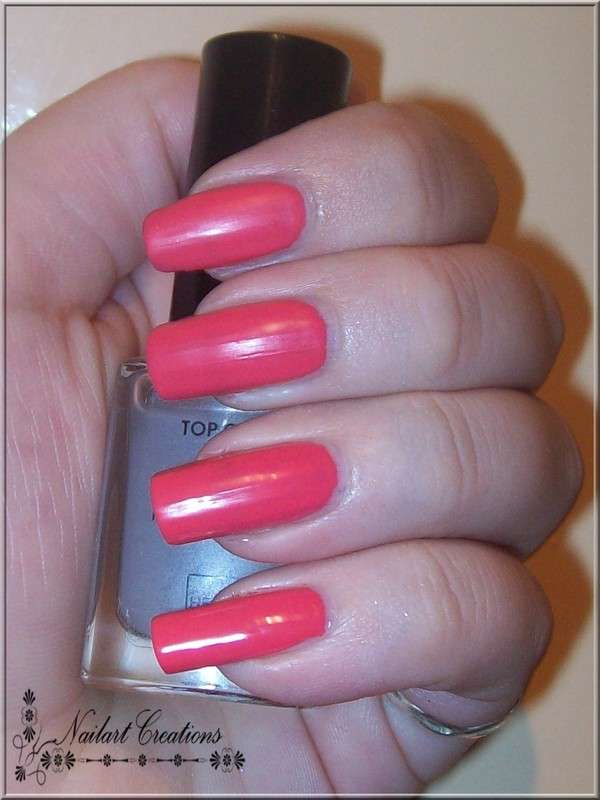
High Waist Pink is niet echt een roze kleur, ik vind hem meer neigen naar koraal/perzik. Toch is het een erg mooi kleurtje. Applicatie is prima na 2 laagjes een mooi dekkend resultaat. Je hoeft dus niet al te veel moeite te doen.
High Waist Pink is not really a pink colour. It's more like a coral/peach polish. Although I really like the colour! Application is alright, you only need two coats.
En omdat ik de laatste tijd helemaal in de matte look zit heb ik deze lak ook mat gemaakt. Best raar eigenlijk, door de lak mat te maken werd hij meteen meer roze. Ik vind hem in ieder geval zowel glanzend als mat erg mooi!
And because I really like the matt look lately. I decided to make this polish matt too. It's a bit strange because the matt polish turns out the polish more pink. But I really like the polish both ways! Shiny and matt!
Zoals ik in het begin van deze post al vertelde ligt nu de Metallics collectie in de winkel, ik heb hier zelf 2 magnetische nagellakjes van maar ben nog niet helemaal overtuigd van deze collectie. De magneet is erg slap en bij mijn eerste pogingen kreeg ik geen enkele resultaat. Ik ben dus nog in overweging of ik deze lakjes ga laten zien ja of nee!
So the Metallics collection is now available. I tried some polishes, but i'm not very impressed by those. The magnet is really weak, and I couldn't get some pattern in it, and the colours are very streaky by themselves. So I'm not sure if I'm going to post about these!
Thanks for reading!
maandag 22 november 2010
Notd: Cupcakes!
Gister liet ik jullie al de leuke cream lakjes zien van La Femme Beauty. Deze heb ik al basis gebruikt voor de nailart die ik jullie vandaag ga laten zien!
Yesterday I showed you the gorgeous cream polishes by La Femme Beauty. Today I'm going to show you the nailart I made with these polishes!
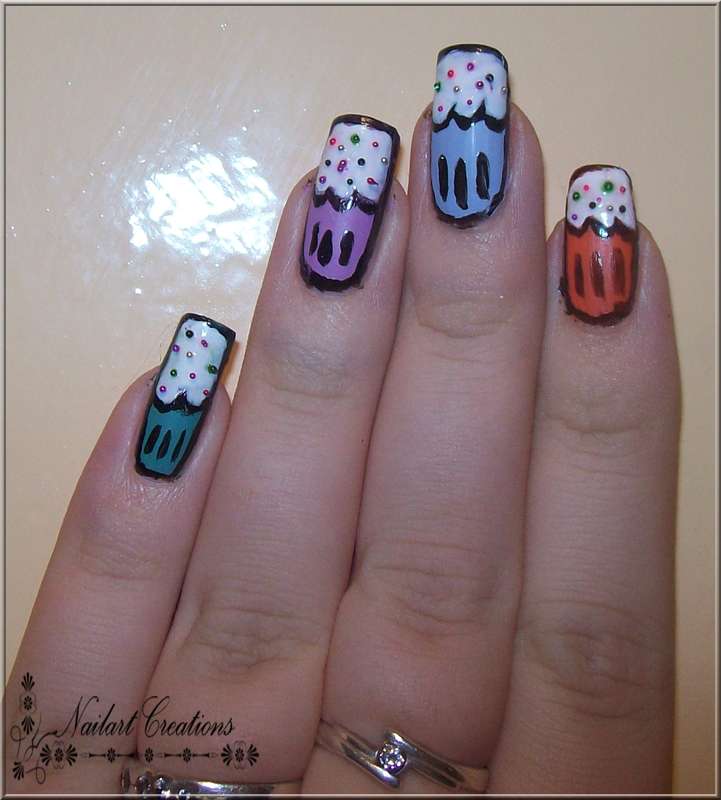
Jaa de titel verklapte het idd al. Het zijn cupcakes geworden! Ik wilde niet standaard ieder cupcake hetzelfde kleurtje geven, dus koos ik voor deze verschillende kleurtjes! Zoals je kunt zien heb ik ook de basiskleur mat gelaten maar er wel overheen gelakt met een glanzende zwart.
Yes the title said it. They're cupcakes! I didn't want to make all the cupcakes the same colour, so I choosed these nice colours! As you can see, the base is matt, the things above it are all shiny.
Hier kun je nogmaals de cupcakes zien. Voor de snoepjes op de cakjes heb ik verschillende soorten gekleurde beads gebruikt. Beads zijn dus hele kleine balletjes. Van deze nailart heb ik een fototutorial gemaakt, dus ben je benieuwd hoe je deze nagels zelf ook kan maken. Hou dan zeker mijn blog in de gaten. Ongeveer eind van de week/begin volgende week zal de tutorial online komen!
Here you can see the cupcakes again. I used coloured beads for the candy on the cupcakes. Beads are tiny balls which you can put on your nails. Do you want to make this nailart too? Make sure you'll check my blog! I made a phototutorial for these nails, so I'm going to put them online at the end of this week or at the beginning of next week!
Thanks for stopping by!
zondag 21 november 2010
La Femme Beauty - Creams
Voor mn laatste nailart creatie gebruikte ik bovenstaande kleurtjes. Ja het is idd een kleurige mani geworden! Bovenstaande kleurtjes zijn alle 4 van La Femme Beauty en komen uit de 'Cream' collectie. De mani laat ik morgen zien, dus vandaag alleen de swatches van deze 4 beauties!
For my last nailart creation I used above polishes. Yes it was a very colourful mani! :-) Above colours are all from La Femme Beauty from the 'Cream' collection. I'm going to show the mani tomorrow so today only the swatches of these 4 beauties!
Hier zie je alle kleurtjes op mijn nagel (hmm precies de tegenovergestelde volgorde van de flesjes hierboven). Op mn wijsvinger zie je Orange Cream, dit lakje is niet helemaal dekkend in 2 laagjes, maar omdat ik dit toch als basis gebruikte heb ik het dit keer bij 2 laagjes gelaten. Op mijn middelvinger zie je Ice Blue Cream, een moeilijk te omschrijven kleurtje maar hij lijkt een beetje mintblauw, ook bij deze heb ik 2 laagjes gebruikt. Op mijn ringvinger zie je Lilac Cream, een prachtig lila crème lakje, ook hier weer met 2 laagjes. En als laatste op mijn pink Mint Cream. Ik vind het niet echt een heel erg mint lakje, hij neigt toch meer naar groen, ook hier weer 2 laagjes lak.
Here you can see all the colours (hmm exactly the opposite way as the bottles..). On my index you can see Orange Cream, it's not really opaque in two coats, but for this mani I used 2 coats. On my middlefinger you can see Ice Blue Cream ( I really like this one, didn't see such a colour before!) Also used 2 coats here. On my ringfinger is lilac cream, a gorgeous lilac colour, this is also 2 coats. The last one is my pinkie, that's Mint cream. I don't think it's a mint colour, it's more green in my opinion, this is also 2 coats.
Hier heb ik de kleurtjes mat gemaakt. Ik vind ze eigenlijk mat nog mooier dan gewoon glanzend. Dit ligt heel persoonlijk, sommige vinden mat geweldig, andere weer niet!
I mattified the colours here, I really like the way it came out! This is something personal, some people don't like matt polishes, others love it!
Wat vinden jullie van matte lakjes? / What do you think about matt polishes?
Labels:
La Femme Beauty,
swatches
And the winner is...!
De giveaway is gesloten, dus het word tijd om een winnaar te trekken! Ik heb Random.org gebruikt om de winactie zo eerlijk mogelijk te laten verlopen!/ This giveaway is closed now, so it's time to pick out a winner! I used Random.org, this is the most honest way to pick out a winner!
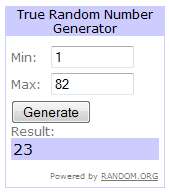
Er was een totaal van 82 entries! Kijk mee wie de winnaar is!/ There was a total of 82 entries, scroll down to see the winner!
De winnaar is nummer 23! / The winner is number 23!
Floor/Marjolein van Sweethippos. Gefeliciteerd! Er is een mailtje naar jullie onderweg!/ The winners are Floor/Marjolein from Sweethippos! Congratz! I sent you an email!
Labels:
Giveaways
zaterdag 20 november 2010
Last chance to enter the giveaway!
The giveaway is closed now!
Vandaag is de allerlaatste dag dat je je nog kunt inschrijven voor de giveaway! Vannacht om precies 12 uur sluit de giveaway! Morgen zal ik hier op mijn blog de winnaar bekend maken. Dus heb je je nog niet ingeschreven? Hier kun je je inschrijven en kun je alle regels lezen!
Today is the last day you can enter the giveaway! This night exactly 24.00 is the giveaway closed! ( Dutch Time) I will announce the winner tomorrow on my blog! So haven't you entered the giveaway yet? You can enter here to read all the rules!
Succes iedereen!/Good Luck all!
Labels:
Giveaways
vrijdag 19 november 2010
Eyeko Polishes
Een tijdje terug won ik de Eyeko giveaway van The Laquer Files, deze week kreeg ik de lakjes binnen, dus kijk mee naar deze beauties!
A while ago I won the giveaway from The Laquer Files, the polishes arrived this week, so i'm going to show those beauties today!
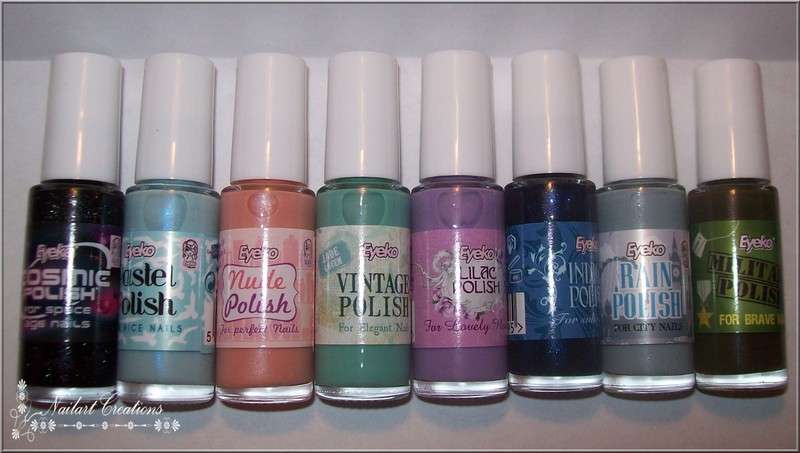
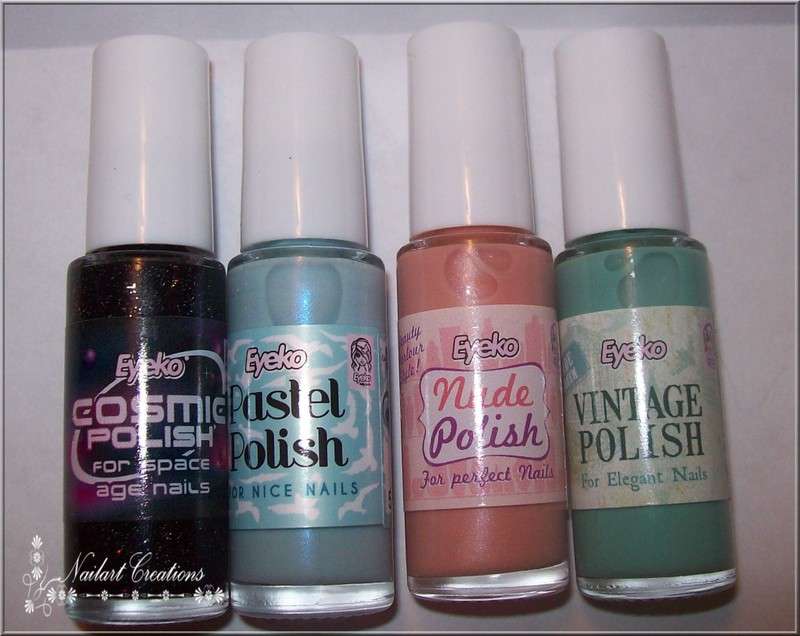
Dit zijn de eerste 4 lakjes van de 8 totaal. Van links naar rechts: Cosmic Polish, Pastel Polish, Nude Polish en Vintage Polish. Dit zijn trouwens mn eerste lakjes van Eyeko!
These are the first 4 from the total of 8 polishes. From left to right: Cosmic Polish, Pastel Polish, Nude polish and Vintage Polish. Btw these are my first Eyeko polishes!
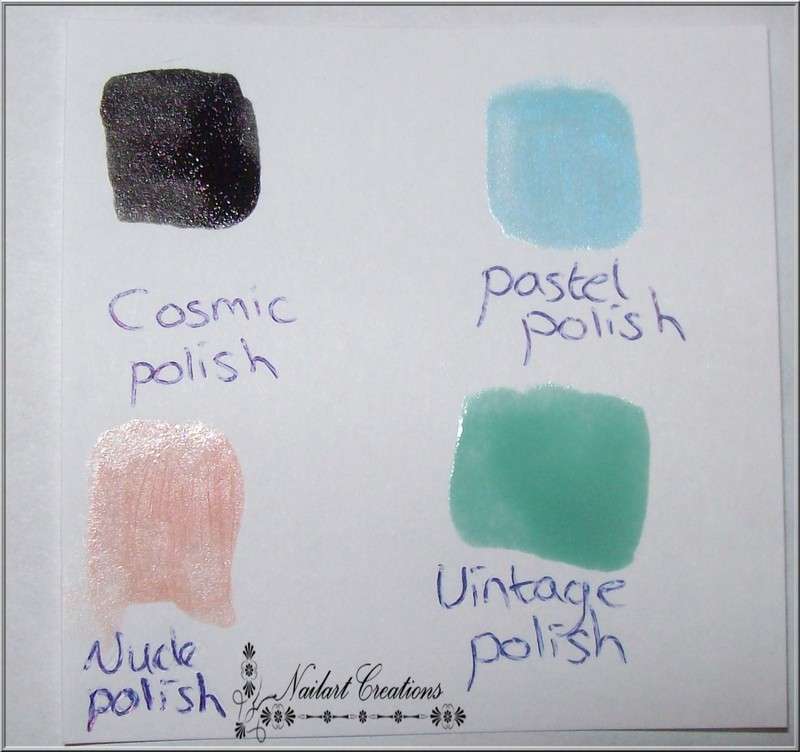
Dit zijn de eerste 4 lakjes geswatcht op een blaadje, ik ben door de nagelwielen heen dus maar even zo! Cosmic Polish is een zwarte lak met verschillende kleuren glitters, Pastel polish is een prachtige blauwe pasteltint, Nude polish is een nude lakje, en Vintage polish is een jade groen lakje.
These are the 4 polishes on a piece of paper. I'm out of wheels so that's the reason why I swatched them on a piece of paper. Cosmic Polish is a black polish with lots of glitters in it, Pastel polish is a beautiful blue pastel polish, Nude polish is a nude polish and Vintage polish is a beautiful jade green polish.
Dit zijn de andere 4 lakjes. Van links naar rechts: Lilac Polish, Indigo Polish, Rain Polish en Military polish.
These are the other 4 polishes. From left to right: Lilac polish, Indigo Polish, Rain polish and Military Polish.
En hier weer de swatches. Rain polish is een blauw/grijzige lak. Military Polish is een prachtige legergroen, Lilac polish is een mooi lila kleurtje (Jeeh lila!) en de laatste is Indigo Polish een donkerblauwe met prachtige glitters.
And here are the swatches. Rain polish is a blue/grayish polish. Military polish is a beautiful military green. Lilac polish is a gorgeous lilac colour (jippie lilac!) and the last one is Indigo Polish, a darkblue with lots of glitter, I love this one!
En dit zijn dan de lakjes! Ik ga er dit weekend een paar van swatchen, dus als jullie verzoekjes hebben dan hoor ik het graag! Dus welk lakje zouden jullie graag zien als swatch?
And these were the polishes. I'm going to swatch some of them this weekend, so if you really want to see one of these polishes, please let me know so I can swatch them for you!
Vergeet niet om mee te doen met de winactie! Vandaag en morgen zijn de laatste dagen!/Don't forget to enter the giveaway! It ends in a few days!
donderdag 18 november 2010
Konad from the old box
Na het zien van de post Konad ideeën vroegen een paar bezoekers mij of ik ook Konad gebruikte voor op mn nagels. Mijn antwoord: Jazeker! Nu moet ik wel toegeven dat je de laatste tijd idd weinig konad ziet verschijnen op mijn blog, de reden? Ach vind handgemaakte nailart meer een uitdaging en komt in mijn ogen vaak wat origineler uit. Sommige dames kunnen overige prachtige nailart maken met Konad, allerlei stempels combineren, kleuren combineren noem maar op, een voorbeeld van iemand welke supercrea's met stempels kan maken is: Glammed up. Goed zo inspirerend ben ik niet met stempels, maar om te laten zien heb ik een aantal foto's uit de oude doos getrokken met konad. Dit zijn overigens geen hele oude foto's, de hele oude foto's zijn allemaal nog met behoorlijke ongelijke nagels.
After showing the post of Konad Idea's some of my visitors asked my if i use Konad on my own nails. My answer? Yes ofcourse! But I have to admit recently I didn't do anything with stamps any more, I really enjoy the handmade nailart, it's more like a challenge for me, and more original, but some ladies can make some really pretty things with stamps! This is a example from someone who can make such nice mani's with stamps: Glammed Up ! Alright I'm not that inspiring with Konad, but I decided to search some old Konad mani's to show you today. Most of them aren't that old, the really old pictures are the pictures with the horrible unequel nails!
Bij deze creatie zie je als ondergrond kleur Sold Out Forever van Catrice. Op deze foto had ik nét mn nagels helemaal kortgeknipt. Hier heb ik met een fauxnad plate deze bloemen gestempeld.
For this creation I used Sold Out Forever by Catrice as my basecolour. On this picture I just cut my nails. I stamped this design from a fauxnad plate.
Dit is de tweede creatie. Als ondergrond heb ik China Glaze - Hot lava love gebruikt. Daaroverheen heb ik met wit het visnet patroon gestempeld van plate M57. Omdat deze stempels vaak te klein zijn voor mijn gehele nagels heb ik er een funky french manicure met Essence Rock 'n Roll onder gemaakt.
This is the second creati0n. For the basecolour I used China Glaze - Hot Lava Love. Above that I stamped the fishnet pattern from imageplate M57 with white. The whole stamps are always to little for my nails, so I made a funky french manicure with Essence - Rock 'n Roll on it.
En dit is dan de laatste. Hier heb ik China Glaze - Anklets of Amethysts als basiskleur gebruikt. Ik ben echt gek op dit lakje, vind hem zo mooi! Daaroverheen heb ik met een fauxnad plate deze bloemetjes gestempeld met special nailpolish Gold black.
And this is the last one. I used China Glaze - Anklets of Amethysts as my basecolour. I really love this polish, it's so pretty! Above that I stamped with Special nailpolish Gold Black this flower from a fauxnad plate.
Dit waren dan 3 foto's uit de oude doos, ik heb naast mijn blog nog een aparte website waar je een overzicht van ruim 3 jaar nailart kunt vinden, deze kun je hier vinden: Alle nailarts
These were some old pics with Konad, I have a website ánd a blog, you can find all my nailarts on my other website. Here are all my nailarts from the last three years until now, pay attention that website is in dutch. You can find the website here.
Thanks for stopping by!
Vergeet niet om mee te doen met de winactie! Je hebt nog maar een paar dagen de tijd!/Don't forget to enter the giveaway! It ends in a few days!
Labels:
Konad
woensdag 17 november 2010
Opi - Russian Navy (Suede)
Opi - Russian Navy (Suede) is het tweede Suede lakje welke ik bezit, naast deze liet ik jullie de vorige keer ookal We'll Always Have Paris zien, en vandaag is het de buurt aan Russian Navy (Suede)!
Opi - Russian Navy (Suede) is the second Suede polish I own, I've got We'll always have paris (Suede) too, you can find that one here! So today it's time to show you Russian Navy (Suede!)
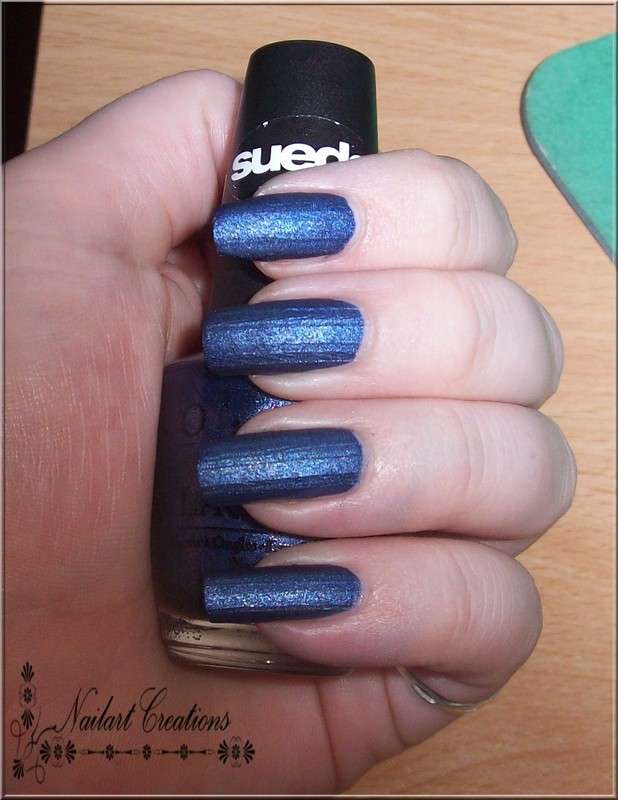
Russian Navy is een blauwe lak die mat opdroogt. De eerste keer was ik net zoals bij We'll always have Paris een beetje sceptisch of ik de lak wel zo geschikt en leuk vond.. Na hem een jaar verstopt te hebben in mijn kast besloot ik hem weer eens uit te proberen. En raad eens? Ik vind hem helemaal leuk nu! Soms moet je een lak dus gewoon een tweede kans geven :-)! Matte lakjes vond ik in het begin helemaal niet mooi, maar de laatste tijd begin ik het steeds leuker te vinden!
Russian Navy is a blue polish which dries matte. The first time I used this one I didn't really knew if i liked it or not... So I put it away for about a year, and now I decided to take a look at it again. And guess what? I really like it now! Sometimes you've got to give a polish a second chance! I didn't like the matte polishes at first sight, but now I totally like them!
Hier kun je Russian Navy nogmaals zien. Haha op de achtergrond zie je het pootje van mn kat! Ze vind het altijd erg interessant als ik foto's aan het maken ben! Goed de applicatie van deze lak is echt geweldig, je hebt maar 1 laagje nodig! Streeploos, mooi dekkend en hij droogt mooi mat op, als je niet zo van mat houdt kun je er natuurlijk een topcoat overheen doen. Dan komen er ontzettende mooie glittertjes tevoorschijn!
Here you can see Russian Navy again. Haha you can see the paw of my cat at the background! She's always very curious when I make pictures of swatches! Alright application of this polish is amazing! You just need one coat, it's not streaky, its opaque ánd it dries matte very good! If you don't like matte polishes you can put a topcoat above it, after using a topcoat you'll see very nice glitters!
En als laatste nog even een snel fotootje toen mijn kat het swatchen niet zo leuk meer vond. Dit is geen goede foto om de lak op te zien, maar het leek me wel leuk om even te laten zien hoe boos onze kat kan kijken :)!
Hihi and for the last time a pic when you can see my cat, when she didn't like all that pictures anymore, it's not a good picture, so it's just for fun to show you how angry my cat can watch :)!
Vergeet niet om mee te doen met de winactie! Je hebt nog maar een paar dagen de tijd!/Don't forget to enter the giveaway! It ends in a few days!
dinsdag 16 november 2010
Miss Helen - Nr 118
Vandaag bij hoge uitzondering een sheer lakje, ik ben absoluut geen fan van sheer lakjes, maar dit is de enige die ik wél erg mooi vind, en de moeite waard vond om te laten zien! Ik heb het idee dat dit soort lakjes een nummer hebben, maar op mijn flesje is geen nummer meer te bekennen (Ik heb hem al een tijdje) dus voor het gemak is dit gewoon een sheer lakje!
Today by exception a sheer polish, we know all that I really hate sheer polishes, but this is the only one i like, and worth to show it. I think originally this polish has a number, but I can't find it anywhere on the bottle (I've got it for a very long time) so to make it a bit easy it's called sheer polish for today!
Dit sheer lakje is een hele zachte roze lak met tonnen gouden shimmer/glittertjes. Zoveel dat de roze lak al bijna niet meer opvalt en je alleen maar gouden shimmer ziet. Gelukkig was er op dit moment nog zon, dus bovenstaande foto is buiten in het zonnetje gemaakt. Dit is ook echt een superlakje om over een andere lak te gebruiken, ik heb helaas nu nog geen voorbeeld, maar ik zal deze lak binnenkort wel eens swatchen over een ander lakje heen!
This sheer polish is a really cute light pink polish with tons of golden glitters/shimmer. There are so many glitters that you don't notice the pink colour anymore, it's just Bam! Gold!
I was very happy that there was sun at that moment, so on above pic you can see this polish in sunlight. This is also a perfect polish for layering, I don't have any examples yet, but next time i'm going to swatch some!
Hier nogmaals een foto in de zon, als je de foto's vergroot (even klikken!) kun je de prachtige gouden glitters zien! Applicatie is echt enorm goed voor een lakje wat al ruim 3 jaar oud is, met 1 laagje zie je al een mooie gouden gloed, na 2 laagjes krijg je dit resultaat. Ik moet er wel bijzeggen dat ik hem niet zo snel zo kaal zou dragen, maar als basislak voor onder een nailart is hij erg mooi, en dus ook over een ander lakje heen. Het potje is niet voor niets al voor meer dan de helft leeg!
Here you can see the polish again in sunlight, when you enlarge the pic (click!) you can see the beautiful golden shimmers! Application is so good for a polish which is three years old, with one coat you've got a nice golden glow, with two layers you've got above result. I have to tell you that I don't wear this polish on his own, but it's a perfect base for nailart or for layering. My bottle is already half empty!
Wat is jullie mening over sheer lakjes?/What's your idea of sheer polishes?
Vergeet niet om mee te doen met de winactie!/Don't forget to enter the giveaway!
Labels:
Miss Helen,
swatches
Catrice - Hip Queens Wear Blue Jeans
Hip Queens wear blue jeans is één van de nieuwe lakjes uit het Catrice assortiment, ik ga de naam even afkorten naar HQWBJ anders wordt het me een beetje te lang worden! Benieuwd hoe dit lakje eruit ziet? Kijk snel verder!
Hip Queens Wear Blue Jeans is one of the three new polishes fron Catrice, I'm going to shorten the name to HQWBJ because the name is really long! So do you want to to see how the polish looks like? Scroll down!
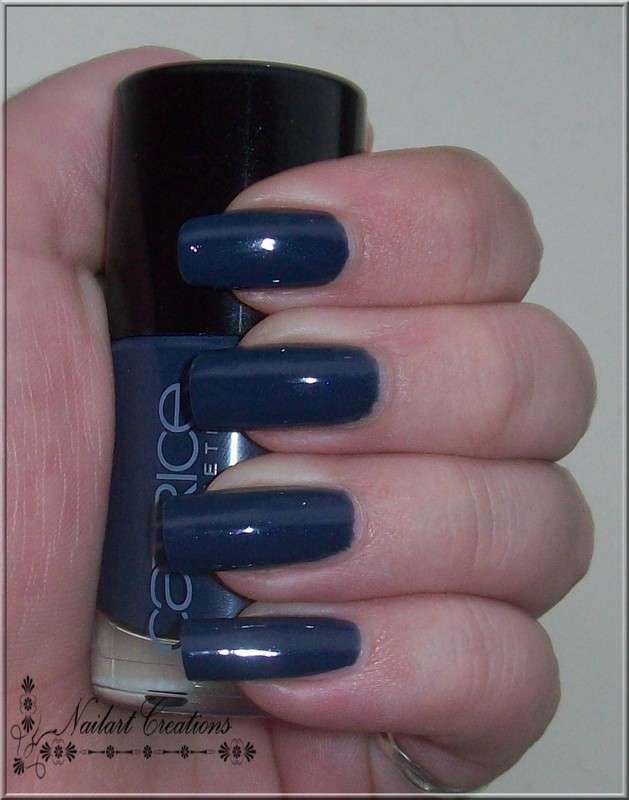
HQWBJ is een donker blauwe lak met hele fijne felblauwe glitter. De blauwe glitter kun je goed zien op bovenstaande foto van het flesje. Ik vind de donkerblauwe kleur echt heel mooi voor de komende winterperiode die ons te wachten staat!
HQWBJ is a really nice dark blue polish with some bright blue glitter in it, you can see the blue glitter better on above bottle pic. I really like the dark blue colour for autumn and winter!
Nogmaals een foto van HQWBJ, alle foto's zijn trouwens binnen gemaakt met flits, het weer in holland is zo dramatisch slecht dat goede mooie foto's zeldzaam te maken zijn hier! Applicatie vond ik persoonlijk wat wateriger dan de overige Catrice lakjes, toch kreeg ik wel een mooi dekkend resultaat na 2 laagjes.
Another pic of HQWBJ, all pics are made inside btw, the weather in Holland is so dramatic so good pictures are very rare for this time of the year! Application from this polish was a little bit watery than the other polishes from Catrice, but the result is nice after 2 layers.
Hebben jullie al één van de nieuwe lakjes uitgeprobeerd?/Did you try one of the new Catrice polishes?
Vergeet niet om mee te doen met de winactie!/Don't forget to enter the giveaway!
zondag 14 november 2010
Stamping Ideas
Stempel ideeën is een nieuw onderwerp op mijn blog. Vanaf nu ga ik afentoe een post doen met wat stempel ideeën voor degenen die afentoe wat inspiratiemissen met stempelen. De stempelideetjes laat ik allemaal zien op tips, dit zodat ik er zelf ook nog eens naar terug kan kijken mits ik even niets weet te doen! In iedere post laat ik 6 stempelideetjes zien, vandaag dus de eerste 6!
Stamping ideas is a new subject on my blog. From now i'm gonna do a stamping ideas post sometimes for the people who are missing inspiration with konad. I show you these ideas on tips so I can watch it when I don't know what to do with my nails! In every post I show you 6 tips with stamping ideas, so today the first 6!
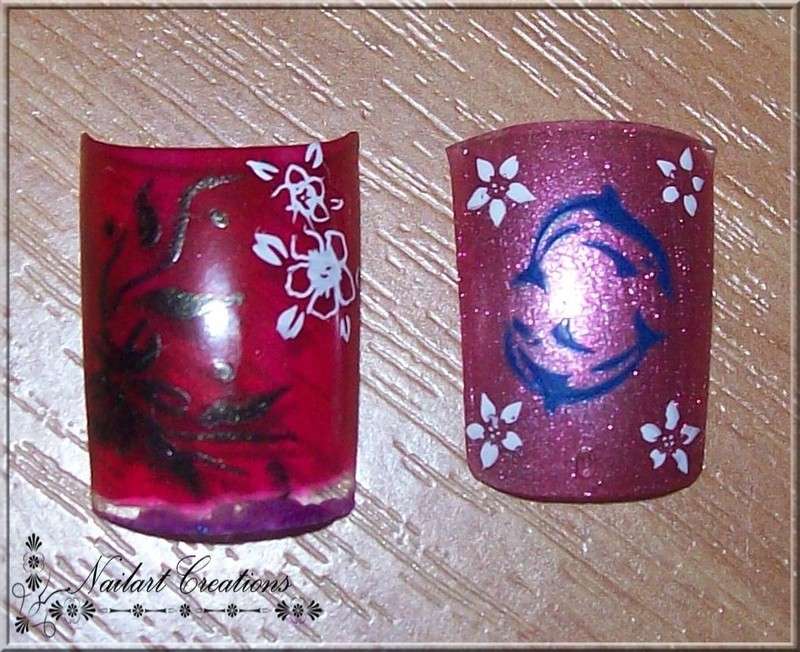
Bij deze creaties heb ik gebruikt gemaakt van fauxnad plates. Natuurlijk kun je alles gebruiken wat hier een beetje op lijkt! Links ben ik begonnen met een rode ondergrond met links een soort zeewier gestempeld met Black Pearl, en rechts wat witte bloemen. Dit idee is op een brede tip gemaakt dus geschikt voor bijvoorbeeld duimnagels, voor overige nagels zullen deze stempels iets te breed zijn.
Rechts ben ik begonnen met een paarse ondergrond hierop heb ik in het midden blauw dolfijntjes gestempeld, met in iedere hoek een witte bloem. Ook deze is op een bredere tip gemaakt waardoor hij geschikt is voor duimnagels. Als je zo'n ontwerp op bijvoorbeeld je eigen nagels wilt doen kun je er ook voor kiezen om gewoon de dolfijnen te stempelen en op één nagel de 4 bloemen eromheen te stempelen.
I used some fauxnad plates for these ideas. Ofcourse you can use everything what you own and which looks a bit like this! On the left you can see a red background with a dark plant on the left side, for this plant i used Black pearl to stamp, and on the right side some white flowers. This idea is made on a very wide tip, so this is perfect for thumbnails, your other nails can be a bit to tiny for these designs.
On the right side you can see a tip with a purpleish background. I stamped some blue dolphins in the middle of it, and in every corner a little white flower. This one is perfect for wide nails too. You can use this design only with the dolphins and then one nail with the white flowers on it. I think that would be very nice!
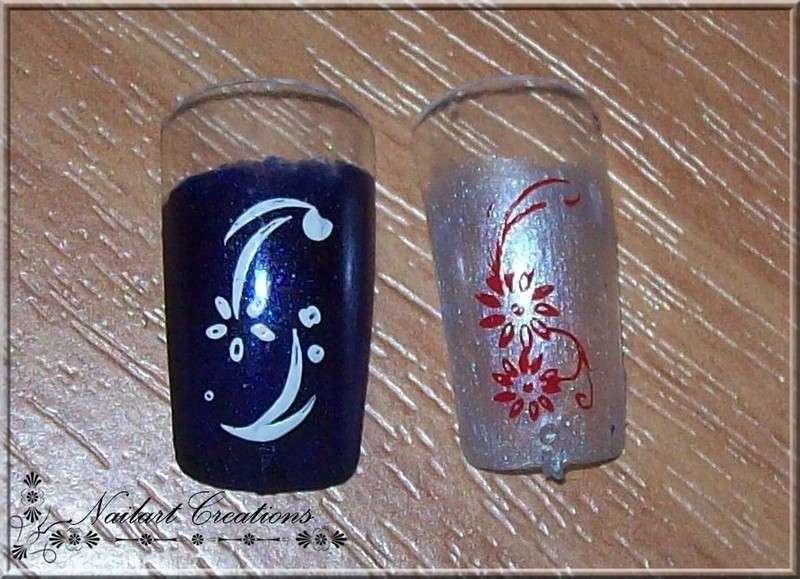
Deze ideeën zijn op wat smallere tips gemaakt, dus zijn geschikt voor al je nagels. Links zie je een combinatie van donkerblauwe achtergrond en witte stempel. De combinatie wit op donkerblauw vind ik erg mooi, je kunt dus bijvoorbeeld ook kiezen voor een donkerblauwe achtergrond met een andere witte stempel erover.
Rechts zie je een pearly witte achtergrond (Ik ben niet zo gek op dit soort lakken) met daarover een rode bloem gestempeld. Ik denk dat je qua kleurcombinatie beter een dekkende witte lak als basis kunt nemen, dan springt de rode stempel er echt uit!
These ideas are made on a little bit smaller tips, so you can use these ideas for all your nails. On the left side you can see a combination of dark blue background with white stamp. I really like this combination, so you can use every stamp you want, because the combinatien of colours is so beautiful!
On the right side you can see a pearly white polish (I don't really like those pearl white polishes) with a red flower stamp on it. I think it would be nicer if you use a opaque white in combinatien with the red stamp.
Dit zijn alweer de laatste 2 ideetjes voor deze keer. Beide ideeën zijn ook weer bruikbaar voor op al je nagels. Links zie je een witte french manicure met een black pearl stempel van blaadjes met detail. Ik vind deze combinatie erg mooi, dus wie weet ga ik hem nog eens uitproberen op mijn eigen nagels!
Rechts ben ik weer begonnen met een blauwe ondergrond. Linksonder in de hoek heb ik met rood een roos gestempeld, en rechtsboven in de hoek met wit een zwierige stempel met blaadjes. Je kunt deze stempels bijvoorbeeld ook omdraaien. Dit ontwerp is ook geschikt voor korte nageltjes, ik heb het zelf al een bij iemand op korte nagels gemaakt!
These are the last 2 ideas for today. You can use both ideas for all your nails. On the left side you can see a french manicure with a dark stamp on it. The stamp is made with the polish Black Pearl, but you can use a black stampingpolish too. I really love this combination, maybe I'm going to made this one on my nails sometimes!
On the right side you can see a blue background, on the left bottom corner you can see a red rose stamped with red polish. On the right uppercorner you can see a white stamp with petals. I made this design once on someone nails, the nails were very short so this idea is good for short nails too!
Wat vinden jullie van dit nieuwe onderwerp?/What do you think of this new subject?
Labels:
Konad
zaterdag 13 november 2010
La Femme Beauty - Lime Cream
Lime Cream is ook weer een lakje uit de cream collectie van La Femme beauty. Eerder liet ik jullie al Pink Cream en Rich Pink Cream zien. Nu is het de beurt aan Lime Cream!
Lime Cream is a polish from the Cream collection from la Femme Beauty. I showed you Pink Cream and Rich Pink Cream already, so now it's time to show you Lime Cream!
Lime Cream is een prachtige groene crème lak. Normaal ben ik niet zo'n superfan van groen, maar deze vind ik erg mooi! De foto is overigens buiten gemaakt in de schaduw.
Lime Cream is a beautiful green cream polish. Normally I'm not a big fan of green polishes, but this one is very lovely! The picture is made outside in shade.
Deze foto is binnen gemaakt met flits. Hij lijkt hier een beetje fluoriscerend maar dat is hij niet. Het is echt een mooi crème lakje. Applicatie is oke, helaas heb ik een potje met een beetje een verrot kwastje, maar ondanks dat lakte hij nog wel redelijk. Op deze foto heb ik 2 dunne laagjes aangebracht.
This picture is made inside with flash. It looks a bit fluor here, but it isn't. It's a real cream polish. Application is oke, too bad my brush is a bit fucked up *sorry*, but further it's oke. I put on 2 layers on this pic.
Is groene nagellak voor jullie een ja of nee?/ Is green polish a big yay or a big no for you?
Vergeet niet om mee te doen met de winactie!/Don't forget to enter the giveaway!
Labels:
La Femme Beauty,
swatches
vrijdag 12 november 2010
China Glaze - Cherry Chrystal
China Glaze - Cherry Chrystal is een lakje wat naar mijn gevoel veel te weinig aandacht krijgt! Ga maar eens googlen op deze naam en je vind erg weinig artikeltjes over dit lakje. Ik vind hem geweldig, dus vandaag een post speciaal voor Cherry Chrystal!
China Glaze - Cherry Chrystal is a polish which isn't very popular. Try to google on the name, you'll found not many posts about this one. So today a special post for Cherry Chrystal, because it's beautiful!
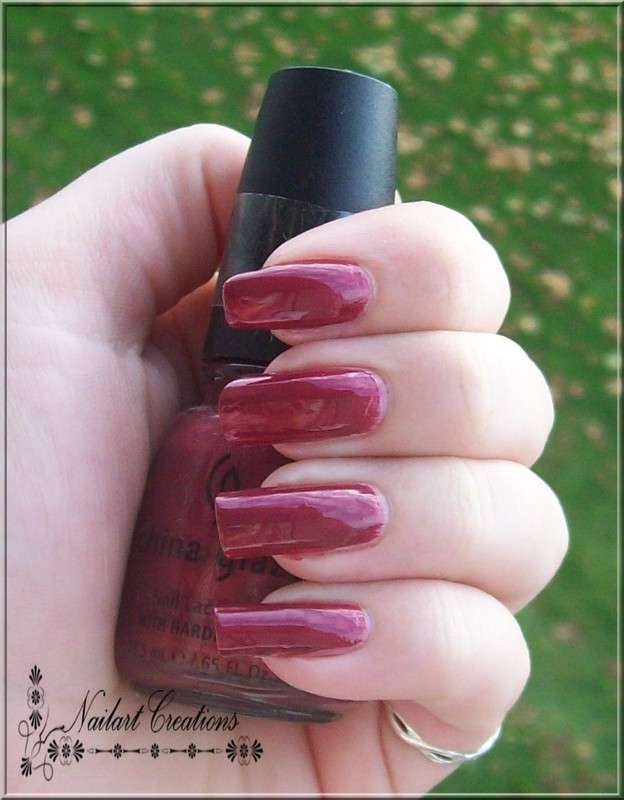
Hier zie je het lakje buiten in de schaduw, helaas was er geen zon aanwezig, want in de zon is deze echt prachtig! Het is een donkerrood kersachtig kleurtje met een kleine hoeveelheid aanwezig shimmer. Eigenlijk is het best een mooi kleurtje voor de herfst!
Here you can see the polish outside in shade, too bad there wasn't any sun, because only sun can show this polish on her best! It's a deep dusty cherry red polish with some shimmer in it. Actually this one is perfect for autumn!
Hier kun je het lakje binnen zien met flits. Niet een perfecte foto, maar deze foto geeft wel de precieze kleur weer. Ook kun je de shimmer een klein beetje zien. Applicatie is goed zoals we wel gewend zijn van China Glaze, ik vind dit één van de fijnste merken. Op de foto heb ik 2 laagjes aangebracht wat heel mooi en gladjes ging.
Here you can see the polish inside with flash. It's not the most perfect picture, but you can see the precise colour here. You can see a little bit shimmer too. Application was good, something we know all from China Glaze, I like this brand! On the picture I used 2 thin coats, application was very smooth!
Vinden jullie ook dat dit lakje wel wat meer aandacht zou mogen verdienen?/ Do you think this is an awesome polish?
Vergeet niet om mee te doen met de winactie!/Don't forget to enter the giveaway!
Labels:
China Glaze,
swatches
donderdag 11 november 2010
Catrice - Pastel Lilac
Pastel Lilac is een lakje uit een oudere collectie van Catrice (Pastel Delight collectie), in de stad waar ik woon verkopen ze in beide kruidvatten geen limited editions van Catrice, dus er zal ook zelden een LE van Catrice voorbij komen. Toevallig heb ik deze kunnen krijgen toen ik een uitstapje aan het maken was!
Pastel Lilac is a polish from an old collection from Catrice (The Pastel delight collection), were I live they don't sell limited editions from Catrice, so I don't post very often about their LE products. I found this one when I was at a trip in another city!
Dit is het lakje buiten in de schaduw. Een heel mooi lila kleurtje met shimmer. De shimmer zorgt er eigenlijk voor dat ik de naam Pastel niet meer begrijp, ik vind het niet echt een pastellak! Verder vind ik hem wel erg mooi!
This is the polish outside in shade. A really pretty lilac polish with shimmer. Because there's shimmer in it, I don't get the point of the name pastel. Further I like the colour!
Deze foto is binnen gemaakt met flits. Op deze foto kun je de shimmer wel zien (even klikken om hem te vergroten!). Applicatie is prima, 2 laagjes geeft een perfect resultaat. Het kwastje werkt ook prima, dus totaal geen problemen!
This pic is made inside with flash. You can see the shimmer on this pic way better (Just click to enlarge it!). Application is good, a perfect result with 2 layers. The brush is good, so no problems.
Wat vind jij van dit soort lila/paarse kleurtjes? Ik vind ze helemaal geweldig!/What do you think about the lilac/purple polishes? I really like them!
Vergeet niet om mee te doen met de winactie!/Don't forget to enter the giveaway!
woensdag 10 november 2010
Safari - Nr 25 & Last Giveaway Reminder!
Vandaag ga ik jullie het tweede lakje laten zien welke je kunt winnen in mijn giveaway!Ik vind hem zelf erg mooi, dat is ook de reden waarom ik deze uitgekozen heb om weg te geven!
Today I'm going to show you the second polish you can win in my giveaway. I really like this polish, that's the reason why I choosed it to give it away!
Nr 25 is een paarse crèmelak met rode ondertoon. De kleur komt op deze foto niet zo heel mooi over. Dit omdat het een nogal sombere dag was en deze in het licht van een lamp gemaakt is. Applicatie is echt geweldig! Met één laagje heb je al een mooi dekkend resultaat, op de foto hierboven heb ik een dun tweede laagje aangebracht zodat de camera er niet opeens een sheer lak van gaat maken!
Nr 25 is a purple with red untertone polish, it has a cream finish. The colour isn't very accurate on my pic, it was a very bad day, and this pic is made with lamplight. Application was amazing! I just needed one coat for full coverage. I added a thin second coat on my pic, so my camera couldn't make the polish sheer!
Deze foto is wel kleurecht, de kleur ziet er in het echt meer zo uit dan op mijn bovenstaande foto. (Deze foto is ook door mij gemaakt alleen geswatcht op mannennagels :P)
This pic is more colour accurate. (This pic is also made by myself, but not on my own hands, these are nails from a man :P)
Wil je meedoen aan de giveaway? Je hebt nog 10 dagen om mee te doen, neem snel een kijkje hier!
Do you want to enter my giveaway? You've got 10 days left! So take a look at my giveaway here!
Labels:
Safari
dinsdag 9 november 2010
Review: Essence Express Dry Drops
Vorige maand heb ik dit flesje Express Dry Drops van Essence gekocht. Ik heb dit product een maand lang uitgetest, dus ga nu een review schrijven!
Last month I bought this bottle of Express Dry Drops by Essence. So I tested it for a month, and now it's time to review this product!
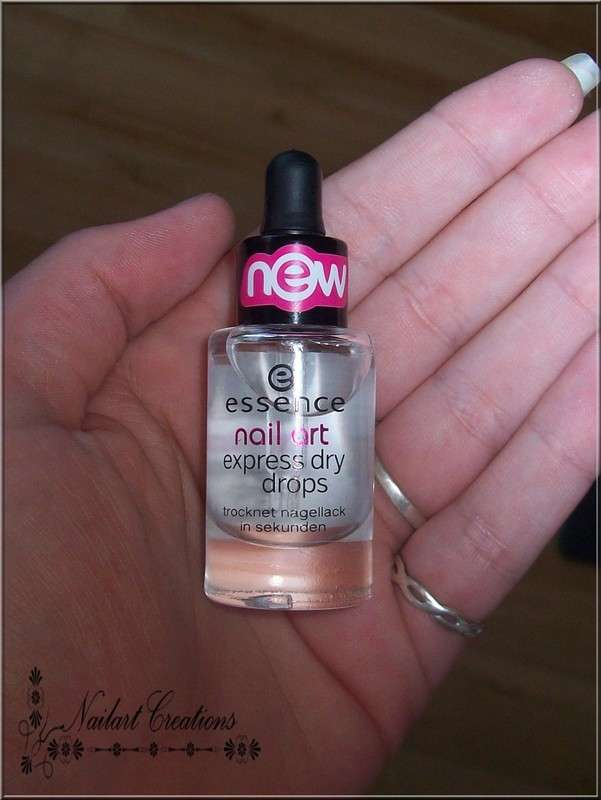
Zo ziet het flesje eruit, redelijk klein dus, het flesje bevat 8 ml. / This is how the bottle looks like, it's a kind of small bottle, it contains 8 ml.
Productomschrijving/ What the product says:
Dit product droogt de nagellak binnen 60 seconden. Breng 1 à 2 druppels aan op de versgelakte nagels.
This product dries your nailpolish within 60 seconds: Apply 1-2 express dry drops on to your freshly polished nails.
Dit is het druppelpipet welke in het flesje zit. Deze vind ik enorm handig, je kunt heel goed de druppels doseren. Dikke pluspunt dus! Verder ben ik niet helemaal weg van dit product. Je nagellak is écht niet helemaal droog binnen 60 seconden, wanneer je ergens tegenaan stoot heb ik nog steeds flinke deuken (Haha já ik heb dit écht uitgetest!). Verder vind ik dat de druppels een viezige olielaag op mn nagels achterlaten. Ik denk zoiezo dat dit heel erg persoonlijk ligt, ik heb meerdere reviews gelezen, ook van meiden die dit product helemaal het einde vonden!
This is the pipet which was in the bottle. I like this! It's so handy to dose the drops. A big plus! Further I'm not totally blown away by this product. My nailpolish isn't dry within 60 seconds, after that time you still got damage when you punch your nails (Yes I tested it!). Oh and these drops are very oily, my nails are dirty oiled when I used this product. By the way I think this is a personal meaning, I've read a lot of reviews, including some very positive reviews from people who are totally in love with these drops.
Thank you for stopping by!
Abonneren op:
Posts (Atom)


